Assigning Features to an Item using a Feature Set
Assigning Web Features to an Item that are based on a Feature Set involves the following steps:
Step 1:
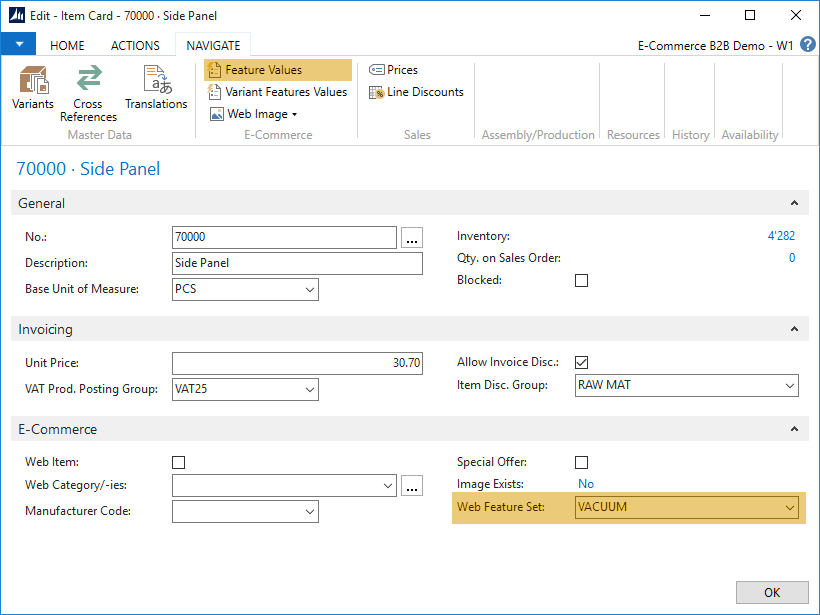
Open the respective Item Card by navigating to Item list, looking up the Item you need to assign the Features to, and opening the Item Card by clicking Edit in the Item List.
Step 2:
In E-Commerce section, select the Web Feature Set code to indicate the Feature Set this Item will be using.
In Navigate section, click Feature Values.

Step 3:
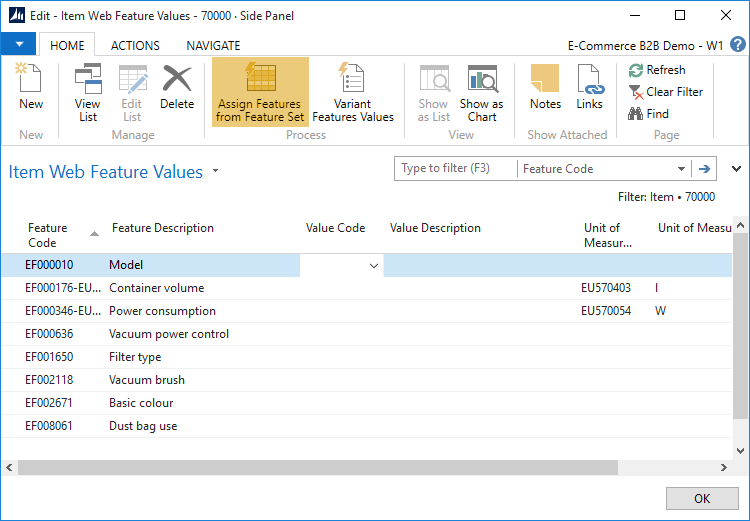
The Item Web Feature Values page will display any existing Features and their respective Values assigned to the Item, or an empty list if there are none present.
Click Assign Features from Feature Set.
The system will populate the list of Item Features with the Features included in the Feature Set.

You must supply values for the Value Code field by selecting the appropriate values that you have set up, and the respective Description field will be looked by automatically.
The Assign Features from Feature Set function will not erase any Feature Values that you have already provided, and it can be safely used to “refresh” the Item Feature list in case there have been some amendments to the Feature Set.
The system will not further limit you to alter the list of features for the particular item. You can add more features even though they do not belong to a Feature Set, and you can also remove the unneccessary features.
Please note that regardless of value type (text, number, range, yes/no etc.) the value must be set up as an entry in Feature Values table. This is required by design to support proper Search and filtering functionality in E-Commerce.
Similar to any other tables in Dynamics NAV, you can also create new Feature Values on the spot by clicking Advanced upon selecting a field value, and using the full Value List page.