Assigning Features to an Item
The common way of assigning Web Features to an Item involves the following steps:
Step 1:
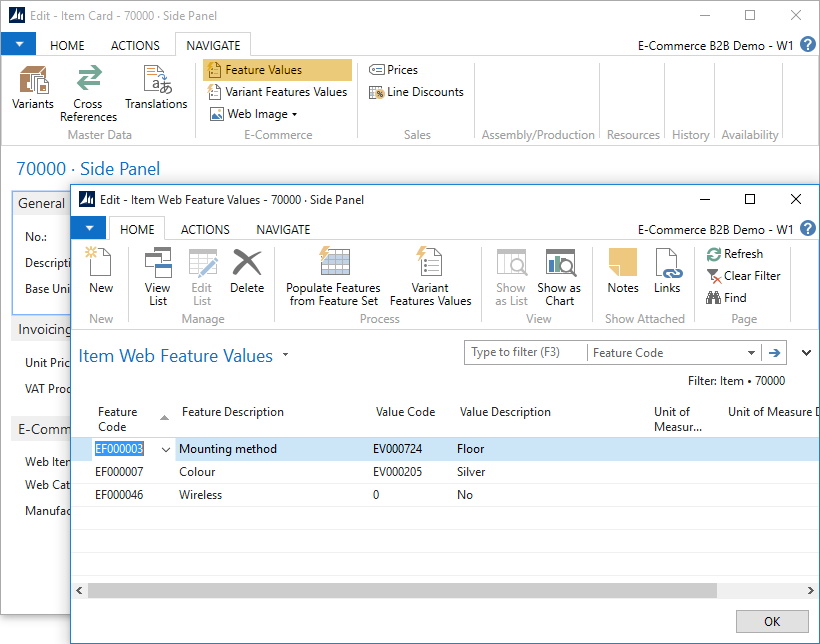
Open the respective Item Card by navigating to Item list, looking up the Item you need to assign the Features to, and opening the Item Card by clicking Edit in the Item List.
Step 2:
In Navigate section, click Feature Values in the E-Commerce section.
The Item Web Feature Values page will display the Features and their respective Values assigned to the Item, and you may edit the list to add new Features and Values, or change/delete the existing ones.

You must supply values for the Feature Code and Value Code fields by selecting the appropriate features and values that you have set up, and the respective Description fields will be looked by automatically.
Please note that regardless of value type (text, number, range, yes/no etc.) the value must be set up as an entry in Feature Values table. This is required by design to support proper Search and filtering functionality in E-Commerce.
Similar to any other tables in Dynamics NAV, you can also create new Features or their Values, and configure Features on the spot by clicking Advanced upon selecting a field value, and using the full Feature List and Value List pages.